This week's drawings
Congratulations on your progress! You've passed the halfway point!
The first half has been aimed at learning how to draw from our imagination. We'll continue to do our imaginary drawings, but this week we'll start learning to draw from life by looking at the human nose.
Here are this week's drawings:
Materials:
- pencil
- eraser
- paper (printer paper, notebook, etc)
- colors (colored pencils, crayons, watercolor, etc)
- alternatives to the above: smart phone or tablet drawing app
Day 52: create a cartoon character

To develop a character, Tom suggests that we start with a circle and augment it using other basic shapes: ovals, triangles, and squares.
So that’s what I did.
I have to admit that drawing a cartoon character is hard for me. So the Procreate video is a bit long, almost 2 minutes.
As we get further down the road, we’ll look at creating various views to make your character 3-D.
Day 53: a tower in two-point perspective
 If you've done the previous perspective drawings, you know that the first step is to draw the horizon. For the tower, we'll draw our horizon in the middle of the page. Next, we draw our two vanishing points. Mark Kistler's step-by-step guide begins on page 185 of you can draw in 30 days. He proceeds to draw a box and then draws another box on the top and a third box at the bottom. He shows us how drawing the shadow using one of the vanishing points serves to anchor the tower to the ground.
He reviews our tower drawing using what he calls the Nine Fundamental Laws of Drawing (concepts that help us create our visual illusions):- Foreshortening (HINT: If you look at a cube and notice that one vertical edge is shorter than another vertical edge, what does that tell you?)
- Placement (HINT: If an object is closer to you than another object where is it placed vertically on your drawing?)
- Size (HINT: What happens to an object if you move it away from you?)
- Overlap (HINT: What is a way that you can tell if one object is nearer to you than another object?)
- Shading (HINT: What does shading do?)
- Shadow (HINT: What does a shadow do?)
- Contour (HINT: The contour defines the shape of an object. Cross-contour lines help to create form.)
-
Horizon (HINT: How is your drawing affected if there is no horizon?)
- Density (HINT: How do far away things appear different from near things?)
How do each of these work? How many do you know before you read Mark's review.
Ravi Jaiswar (a.k.a. #arttrap) demonstrates How to draw a building in two point perspective: Day 24 in his 16 minute video.
Here is my 1 minute video of my armadillo building:

- Foreshortening (HINT: If you look at a cube and notice that one vertical edge is shorter than another vertical edge, what does that tell you?)
- Placement (HINT: If an object is closer to you than another object where is it placed vertically on your drawing?)
- Size (HINT: What happens to an object if you move it away from you?)
- Overlap (HINT: What is a way that you can tell if one object is nearer to you than another object?)
- Shading (HINT: What does shading do?)
- Shadow (HINT: What does a shadow do?)
- Contour (HINT: The contour defines the shape of an object. Cross-contour lines help to create form.)
- Horizon (HINT: How is your drawing affected if there is no horizon?)
- Density (HINT: How do far away things appear different from near things?)
How do each of these work? How many do you know before you read Mark's review.
Day 54: the human nose
Darlene Nguyen gives us step-by-step instructions on How to draw a nose from the front – 7 easy steps.
I like how she gives us a preview, tells us she breaks the nose into 3 shapes for drawing, lists the materials we'll need, and guides us through the drawing.
Proko has two videos that I recommend:
- How to Draw a Nose - Anatomy and Structure (7 minutes, 1.2M views)
- How to Draw a Nose - Step by Step (6 minutes, 2.6M views).

- Tell them what you’re going to tell them (he organizes this into 3 pieces
- simple nose box
- anatomy of nose
- advanced rendering of nose: break major -lanes into minor planes
- Tell them:
- simple nose box has two side planes, a top plane, and a bottom
- the anatomy of the nose is made up of 3 parts:
- bridge made of bone and cartilage;
- ball made of cartilage; and
- wings made of fatty tissue
- minor planes broken into 3 parts for three-quarter view:
- bridge has 2 top, 2 ridge and 2 side minor planes
- ball has top, front, bottom, and 2 side minor planes
- wings has top, 2 side, and bottom minor planes
- Show examples
Day 55: lettering in two-point perspective

Jescia Hopper shows you How to draw letters in two point perspective in her 9 minute video.
I
Day 56: the foot

Here is a video showing how to draw 9 views of the foot: How to Draw Feet from any Angle, Easily! by Fine Art-Tips (8 minutes, 670K views)
Day 57: color: color wheel

Let's put our colors so that each secondary color is between the two primary colors that are mixed together to make it. And we'll do the same with the tertiary colors, placing each between the primary color and the secondary color that are mixed together to make it.
If we do this, we'll end up with the color we started with. For example, if we start with red . . .
- PRIMARY
- SECONDARY
- TERTIARY
- Red
- Red-Orange
- Orange
- Yellow-Orange
- Yellow
- Yellow-Green
- Green
- Blue Green
- Blue
- Blue-Violet
- Violet
- Red-Violet
- Red
. . . we'll end with red. So it makes sense to loop the ends together and make a wheel.
I’ve made color wheel for 3 mediums and I learned a lot. The colors I mixed didn’t match what I expected. For example, in my WATERCOLOR wheel I can’t see much difference between red and red-orange.
To make your wheel:
- Draw a circle.
- Draw a vertical line down the center of the circle
- Draw a horizontal across the center of the circle.
- Divide each segment (quarter circle) into 3 equal parts
- You now have 12 segments. Color each segment with a different color as listed above: Red, Red-Orange, Orange, Yellow-Orange, Yellow, etc.
Day 58: texture: invented vs simulated
We have learned what texture in art means and the difference between actual texture and implied texture. Today we are going to learn the difference between invented texture and simulated texture.

A good example of simulated texture is Albrecht Dürer's rendering of the rabbit's fur in his Young Hare watercolor.
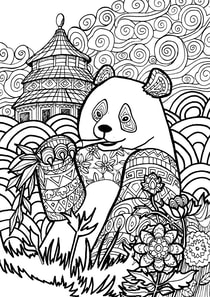
You would never see a panda covered with the invented designs in the accompanying drawing.
I'm asking you to do two drawings today:
- draw an animal partly or wholly covered with invented texture.
- draw simulated texture on an animal.
No comments:
Post a Comment