WHY DRAW?
There are many reasons why people draw. Here are some of the most common benefits of drawing:
- Improved visual thinking: Drawing helps us to see the world in a more mindful and observant way. It can also help us to better understand the relationships between different objects and concepts.
- Increased creativity: Drawing can help us to tap into our creative side and come up with new ideas. It can also help us to solve problems in a more innovative way.
- Enhanced communication: Drawing can be a powerful way to communicate our thoughts and feelings to others. It can also help us to better understand the messages that others are trying to convey.
- Reduced stress: Drawing can be a relaxing and therapeutic activity. It can help us to focus on the present moment and let go of our worries.
- Increased self-expression: Drawing can be a way to express ourselves and our unique perspectives on the world. It can also help us tobuild self-confidence and self-esteem.
Of course, these are just a few of the many reasons why people draw. Ultimately, the reasons why you draw are up to you. But if you're looking for a way to improve your visual thinking, boost your creativity, communicate more effectively, reduce stress, or simply express yourself, then drawing is a great option.
Here are some additional benefits of drawing:
- Improved hand-eye coordination: Drawing requires us to use our hands and eyes in a coordinated way. This can help to improve our fine motor skills and coordination.
- Increased focus and concentration: Drawing can help us to focus on the present moment and let go of distractions. This can be especially helpful for people who have trouble focusing or who are easily stressed.
- Enhanced memory: Drawing can help us to remember things better. This is because when we draw, we are actively engaging our brains in the process of observation, analysis, and creation.
- Improved problem-solving skills: Drawing can help us to solve problems in a more creative and innovative way. This is because drawing forces us to think outside the box and come up with new solutions.
So, if you're looking for a fun, rewarding, and beneficial activity to add to your life, then I encourage you to give drawing a try. You might be surprised at how much you enjoy it!
(the above was contributed by Google’s Bard)
This week's drawings
- sketching - this week’s sketching gives you a warm up exercise that reminds you that drawing is simply making marks
- contour drawing - contours are a key component of drawing from life. This week’s exercise gives you a way to hone your eye/hand coordination skills whenever you think them dull.
- the mouth - like the eye and nose in previous weeks, we’re investigating the facial features individually in preparation for drawing realistic faces
- the arm - similar to the facial features, we are examining the limbs in preparation for figure drawing
Materials:
- pencil
- eraser
- paper (printer paper, notebook, etc)
- pen
- colors (colored pencils, crayons, watercolor, etc)
- alternatives to the above materials: a drawing app on a tablet or smart phone
Day 59: a city in two-point perspective

- Tom McPherson does a marvelous job showing us How to draw a city in two-point perspective as he creates a fascinating intersection and as an aside, a canal with long boats. Additional shadows would have made Tom’s city more 3-dimensional.
- In How to Draw a City in Two-Point Perspective for Beginners by the Art Academy you’ll see how the artist uses a ruler and the vanishing points to find the appropriate line slope.
Day 60: learning your character's views

- silhouette
- palette
- exaggeration

Tom Bancroft offers some ideas on character design starting on page 54 of Creating Characters with Personality. And on page 132 in his "It Takes Two", Tom has a couple of tips if you are creating a pair of characters.
Day 61: sketching
This may seem like we’re going backwards, but learning, in general, is very much a two step forward, one step backwards process.
The key to sketching is developing eye-hand coordination. The following warm-up exercises will help (starting at minute 2, watch Drawing for Beginners, Day 1 by Abhishek).

- draw horizontal lines across the paper, left to right - 40 times
- draw horizontal lines across the paper, right to left - 40 times
- draw vertical lines down the page - 40 times
- draw vertical lines up the page - 40 times
- draw 40 circles clockwise
- draw 40 circles counter clockwise
Another way to warm up is to do texture doodles. I started off my warm-up doing just that. Here are two tutorials on drawing various textures:- How to Draw Texture - Part 1 by Candy Brush (14 minutes, 498K views)
- How to Draw Texture - Part 2 by Candy Brush (11 minutes, 207K views)
And, probably more fun, here is a demonstration on doing 24 doodle/zentangle/mandella patterns by Charvi Ashtekar.
Here is my Procreate video of this week’s warm up:
This may seem like we’re going backwards, but learning, in general, is very much a two step forward, one step backwards process.
The key to sketching is developing eye-hand coordination. The following warm-up exercises will help (starting at minute 2, watch Drawing for Beginners, Day 1 by Abhishek).

- draw horizontal lines across the paper, left to right - 40 times
- draw horizontal lines across the paper, right to left - 40 times
- draw vertical lines down the page - 40 times
- draw vertical lines up the page - 40 times
- draw 40 circles clockwise
- draw 40 circles counter clockwise
- How to Draw Texture - Part 1 by Candy Brush (14 minutes, 498K views)
- How to Draw Texture - Part 2 by Candy Brush (11 minutes, 207K views)
Day 62: the mouth

- He starts with a photograph that we hwill use as a model
- He sketches the mouth’s contour
- He adds the shadows of the two lips
- He adds halftones to match the shading of our model
- Finally, using a halftone, he draws flesh on the upper lip and the philtrum
Day 63: the arm

- a triangular shape at the shoulder for the deltoid buldge a elongated rectangle for the biceps
- a tapering shape for the forearm
- a small triangle for the hand
- small triangles for the fingers and thumb
In his video, How to Draw Arms - Beginner to Pro, Kenzo (a.k.a. Love Life Drawing), gives us guidance on how to use the size of the head to get the proportions of the arms correct (the arm is 3 heads long). He also suggests using tapering lines as a way to start learning how to draw arms. He introduces the deltoid muscle that forms the front of the shoulder and transitions into the upper arm. Finally, for beginners, he shows how the arm can be thought of a series of forms: the upper arm as a cylinder; the upper forearm as an elongated egg; and the wrist as a boxy form.
- How to Draw Biceps - Upper Arm Anatomy for Artists by Proko (9 minutes, 305K views)
- How to Draw Forearms - Arm Anatomy for Artists by Proko (16 minutes, 305K views)
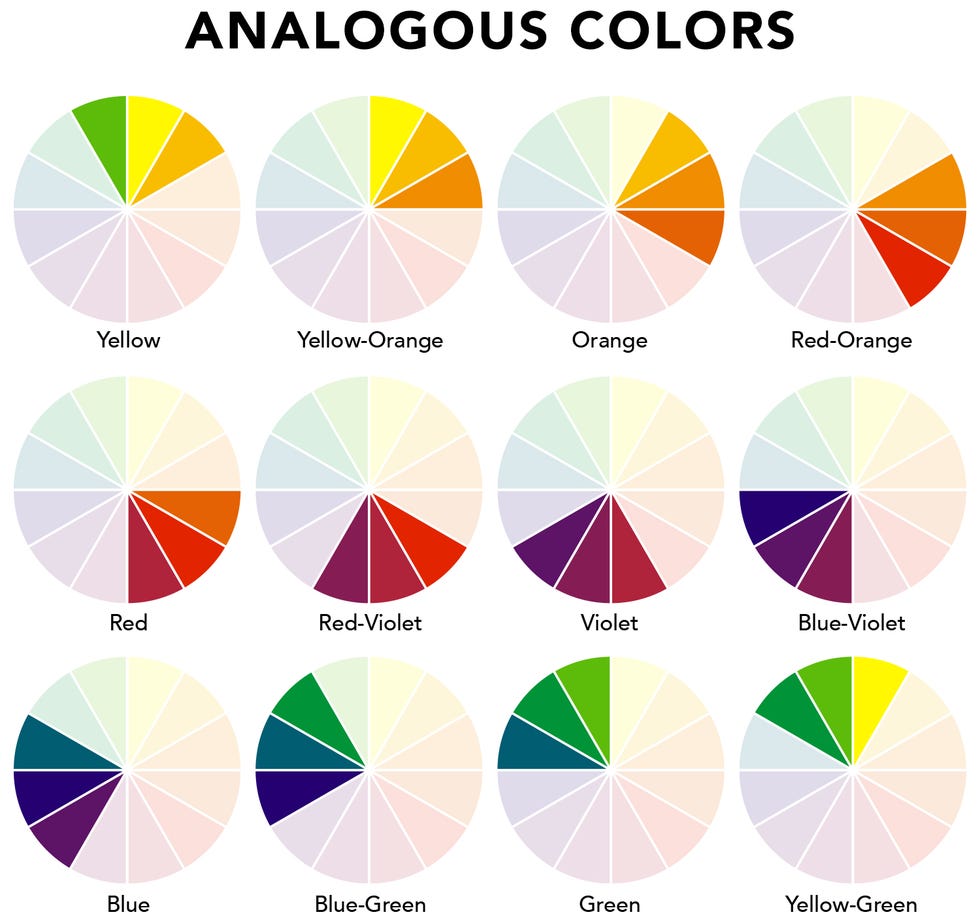
Day 64: color harmony: analogous colors
- Hue - the location of a color on the color wheel.
- Saturation - also known as intensity or chroma, is used to describe how vibrant a color is
- Value - is used to describe the darkness or lightness of a color. We use white and black to vary the value by making tints and shades of a color.
- Temperature - refers to colors being warm or cool and how various hues of the same color can be warm or cool.
- Monochrome
- Complementary
- Split complementary
- Triadic
- Tatradic
- Analogous
- Choose a dominate color
- Keep it simple
Day 65: contour drawing

No comments:
Post a Comment